

The Google Android documentation shows how to use Brush to create color-gradient backgrounds.
In this article, we look at some ways to play with these brushes to create more complex patterns by overlaying different textures.
Note that this example code has not been optimized to avoid useless recompositions, so I do not recommend using it as-is for production without going through a bit of recomposition count testing. A future article will look at how we can use these backgrounds in conjunction with a rasterized image to add patterns to an existing image.
Step 1: Using the base brush gradients
If you’ve read the Android Developer page, you can skip this part!
When drawing a box the background Modifier may be used to define a brush parameter. Compose comes with a few pre-defined Brushes.
Column // we need a column to wrap the boxes otherwise the example boxes will just overlay each other
{
   for (brushValueByName in mapOf(
            "Horizontal Gradient" to Brush.horizontalGradient(colorStops = threeColorStops),
            "Vertical (Linear) Gradient" to Brush.linearGradient(colorStops = threeColorStops),
            "Radial Gradient" to Brush.radialGradient(colorStops = threeColorStops),
            "Sweep Gradient" to Brush.sweepGradient(colorStops = colorStopsWithReturnFirstColor))
   ) {
        Box(modifier = Modifier.background(brush = brushValueByName.value))
   }
}
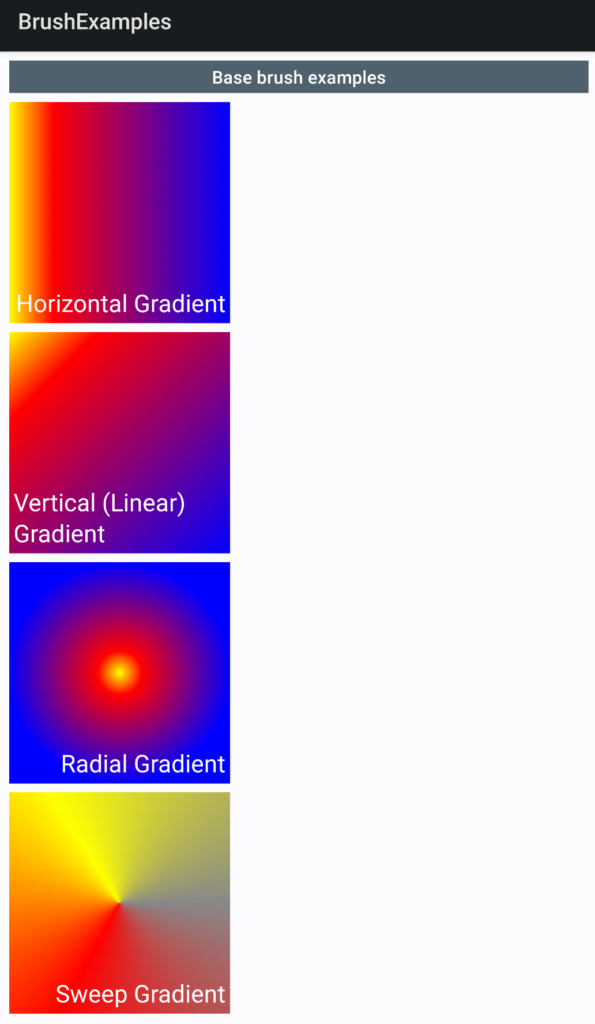
The results for these four gradient brush boxes are shown below:
Step 2: Adding TileModes and Offsets to the gradients
The gradient brushes can be combined with tiling patterns and offsets, and used in the same way to fill a Box’s “background”.
for (brushValueByName in mapOf(
    "Horizontal Gradient, repeated tileMode" to
        Brush.horizontalGradient(colors = threeColors,
                                 endX = tileSize,
                                 tileMode = TileMode.Repeated),
    "Linear Gradient, mirror tileMode" to
        Brush.linearGradient(colors = threeColors,
                             end = Offset(tileSize, tileSize),
                             tileMode = TileMode.Mirror),
    "Radial, decal tileMode" to
        Brush.radialGradient(colors = threeColors,
                             center = Offset(tileSize, tileSize),
                             tileMode = TileMode.Decal),
    "Sweep, offset" to
        Brush.sweepGradient(colorStops = colorStopsWithReturnFirstColor,
                            center = Offset(120f, 450f)),
)) {
      Box(modifier = Modifier.background(brush = brushValueByName.value))
   }
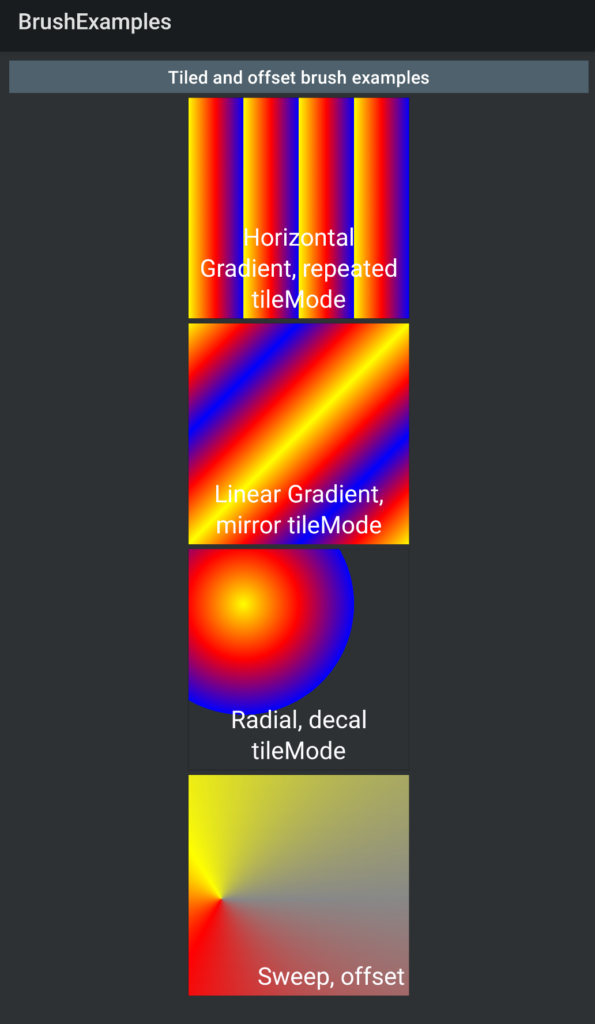
The results for these four gradient brush boxes are shown below:
Step 3: Layering on another Gradient Box for plaid effects
Once we know how to generate a patterned background, why not layer up the patterns to create new textures?
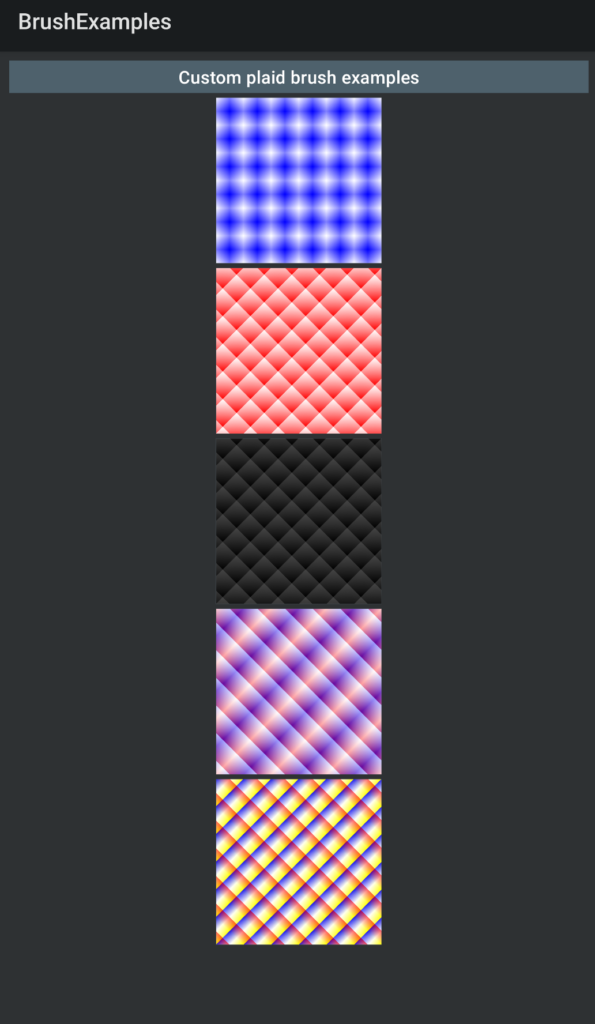
Here are some results from doing this with the out-of-the-box shader brushes.
Each specific shader brush is a customized instance of one of the available Shaders we already used: LinearGradientShader.
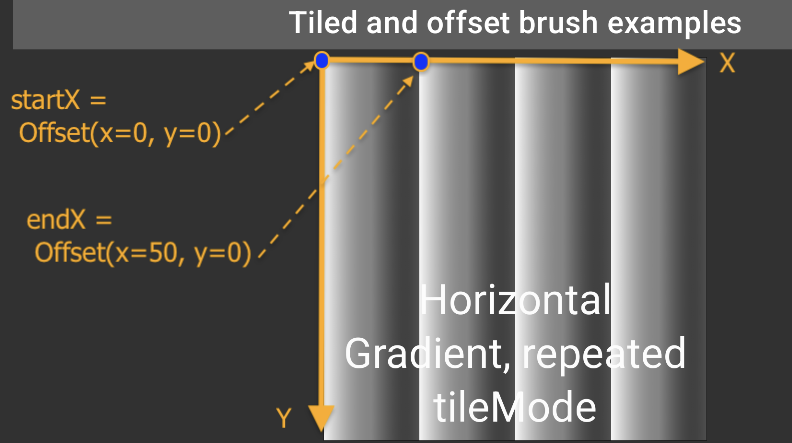
The orientation of the « stripes » will be determined by the value given for the « from » and « to » coordinates. See the illustration below if you are unfamiliar with the Compose Canvas coordinates system. The light-orange solid arrows show the x-axis (aka abscissa) and y-axis (aka ordinates) axes. The two dark-blue dots represent the 2 Offset coordinates startX, ie « from », and endX, ie « to » that we are using to define the gradient layout.
These 2 coordinates define a line segment over which the color gradient progresses from color to color, and the « stripes » emerge perpendicularly to this line due to the return to the first color of the gradient on the next « tile ».
A custom ShaderBrush can be defined like this:
val customVerticalBrush = remember {
        object : ShaderBrush() {
            override fun createShader(size: Size): Shader = LinearGradientShader(
                colors = listColors,
                from = Offset.Zero,
                to = Offset(tileSize, 0f),
                tileMode = TileMode.Repeated
            )
        }
    }
By piling up two boxes containing backgrounds filled with different shaderBrush instances (horizontal stripes over vertical stripes for example) and using non-opaque gradient colors, we can weave more complex patterns as shown in the « Custom plaid » illustration above.